Hello TAPC – if you’re coming here after the Snapseed Demo today, I’ll have a complete tutorial on here in a few weeks. As of now, it’s just screenshots I saved in case the Wi-Fi didn’t work in the Trinity Arts building. If you need help with Snapseed, use the three vertical dots on the top right and access the Tutorials or Help. Check back in a couple weeks for the tutorial! Thanks for your support. -Manny
Tutorials
Back-Button Focus on Canon 7D Mark II
When using Back-Button focus on the Canon 7D Mark II, you may find that your AF points change on focus. If that’s the case, then follow these steps to maintain your current focus settings.
1. Select Custom Controls menu
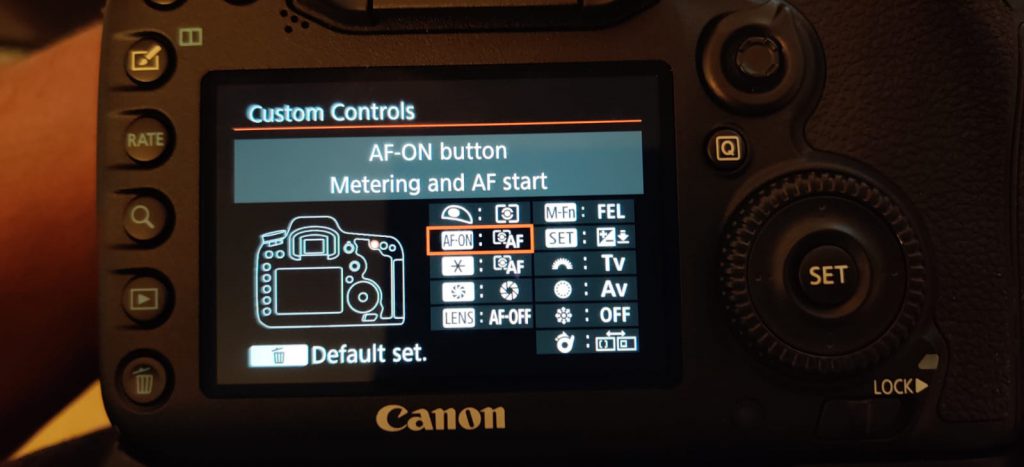
2. Select the button you’d like to assign
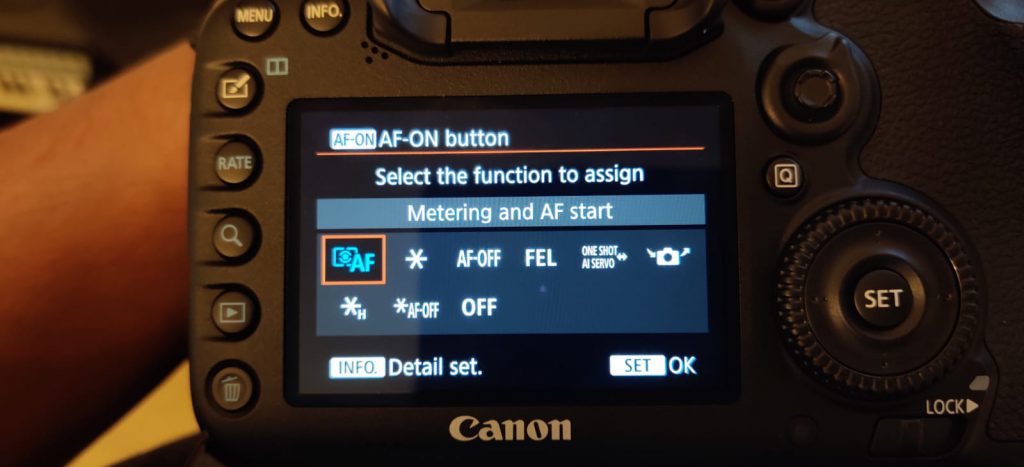
3. Select the function and press INFO button
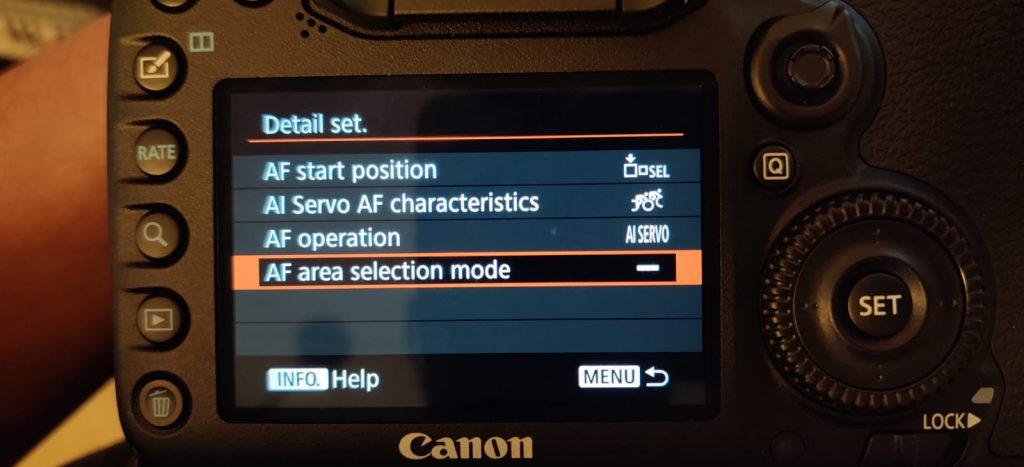
4. Select the AF area selection mode
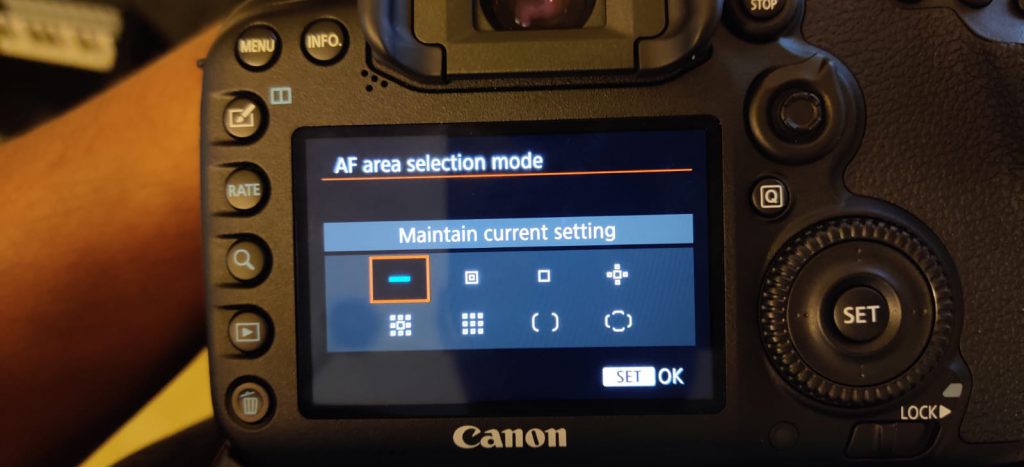
5. Select “Maintain current setting” and press SET to save it.
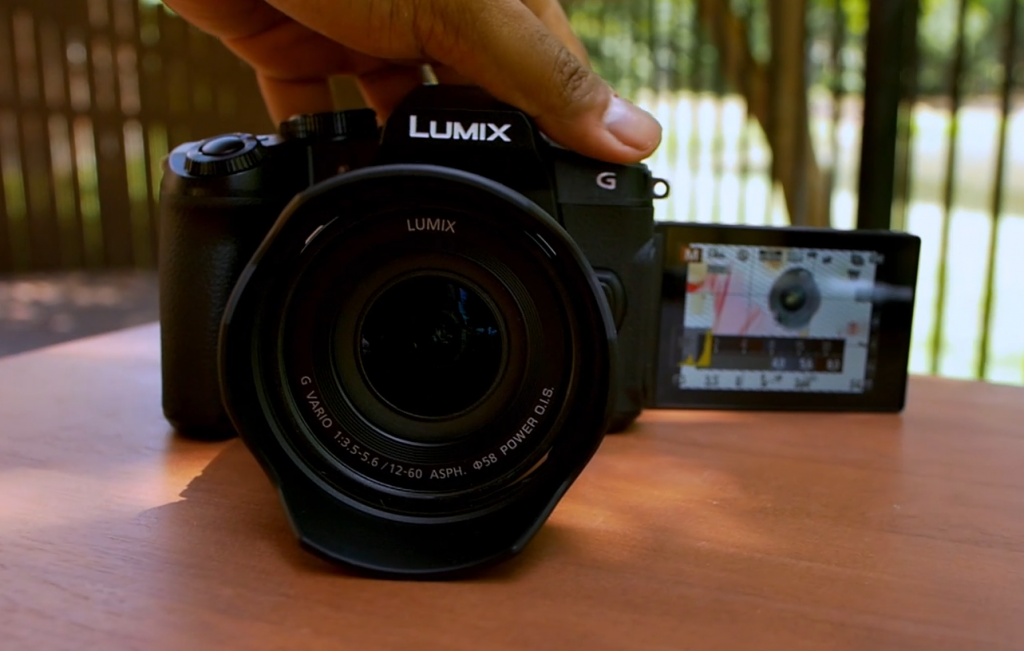
5 amazing vlogging features on the Panasonic Lumix cameras
1. Auto ISO
If you’re a hand-held vlogger, one thing that might drive you nuts is the constant adjustment to exposure.
Ain’t no vlogger got time to adjust exposure!
-OpenFilmmaker.com
Well if you have a manual lens, then set your shutter speed and record away with this cool trick! You can also use this priority mode with native, automatic lenses, but you’ll need to be mindful of drastic exposure changes since two factors (both aperture and ISO) will be affected.
2. Focus peaking
Let’s face it, these Panasonic cameras don’t have the best auto-focus technology. I’m constantly shooting in manual focus and this feature is so helpful in highlighting the areas in focus. It can be found in the custom menu page 4/9. There are two sensitivity settings, low and high which sets the amount of highlighted pixels on screen.
For vlogging, set it on manual focus and aim the camera at yourself. With the help of focus peaking, you can easily see on the articulating screen when you are in or out of focus. Because you’re in manual focus, you don’t have to worry about focus hunting which will only help your vlogs and videos look more professional.
3. Snap movie
Snap movie is a great way to shoot small clips of video with ability to automatically pull focus. That’s right! Set your camera on auto focus and head over to the motion picture menu, page 1/5. Select snap movie and set pull focus to “on”. Check it out to add some nice variety to your videos.
4. 4K Cropping
If you’ve been making videos for a while, it’s likely you also spend a lot of time editing. With this feature, you can pan and zoom in-camera! This saves so much time in post. Just select your starting and ending position and the camera will create a 1080p clip for you! With all the time you save, you can put that time towards watching all the OpenFilmmaker videos on YouTube. 🙂
5. ImageApp for Monitoring
Don’t want to spend hundreds of dollars on an external monitor? Well neither do we! Using your phone as a monitor can be immensely helpful. You can set aperture, shutter, iso, white balance, and other settings directly from your phone or tablet. These settings take effect immediately on your camera. You can even use this like a hidden camera to spy on your kids eating your chocolate chip cookies that you bought to satisfy your late night sugar addiction. Don’t worry, we won’t tell anyone.